
• 120 3rd Ave Unit 1, Neptune City, NJ 07753
‹ Playa Bowls Equipment Information Portal
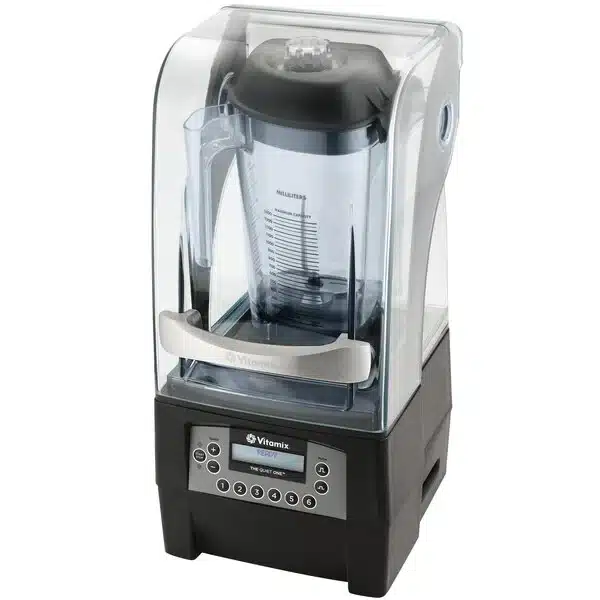
Vitamix “The Quiet One” Blender
Blenders

Vitamix “The Quiet One” Blender

Model / SKU
36019
01Warranty
  • Warranty Structure
  • One (1) Year Labor, Three (3) Year Manufacture Defects
  • *WEAR AND TEAR IS NOT COVERED UNDER WARRANTY*
  • Blade Assembly, Container, Etc.
  • One (1) Year Warranty Manufacture Defects
  • *WEAR AND TEAR IS NOT COVERED UNDER WARRANTY*
02Documents
03Maintenance schedule
Daily
  1. DO NOT BANG THE CONTAINER AGAINST A SURFACE
  2. DO NOT REMOVE OR PLACE THE CONTAINER ON THE BASE WHILE
  • THE MACHINE IS RUNNING
  • This will wear down the blade assembly and damage the drive socket.
  1. DO NOT SHAKE OR RATTLE THE MACHINE OR CONTAINER WHILE IN USE
  • This will damage the blade assembly and the ‘teeth’ on the drive socket.
  1. DO NOT PLACE FOREIGN OBJECTS IN THE CONTAINER WHILE BLENDING
  • A chipped blade could lead to personal injury.
  1. DO NOT OVERFILL THE CONTAINER
  • Overfilling can trigger the Thermal protector and shut off your machine. Turn the power OFF, take the container off of the base and wait for the motor to cool down. Your mixture may be too thick or you may be processing too long at a LOW speed setting. If you detect a burning odor, add more liquid to your mixture or lessen the load. You should also check the condition of your container bearing assembly.
  • Drive Sockets should be checked daily for worn teeth and cracks.
  • Wash the blender container after each use to prevent food residue from drying, sticking, or causing cloudiness.
NightlyMotor Base/Control Panel
  • Unplug the power cord and gently wash the outside surface with a damp soft cotton cloth moistened with a mild solution of warm water* and nonabrasive detergent or liquid spray cleaner. Never immerse the motor base in water or other liquid. Dry with a soft cotton cloth.
Lid
  • Wash in warm, soapy water. Rinse clean under running water and dry.
Cover Door
  • The cover can be removed and cleaned by placing under running water and washing with a soft cloth. Wipe dry and replace back on the base.
Container Centering Pad
  • Remove the centering pad. Wash the pad in warm, soapy water. Rinse clean under running water and dry. Reassemble before use. Replace the sound enclosure. The centering pad should be flat on the motor base.
Container
  • The Advance® container has been designed to be chemical resistant. Hand wash blender containers, DO NOT put the containers through a dishwasher. The high temperatures and/or chemicals in these machines may compromise the surface of the blender containers over time.
  • To Clean: Wash all container parts in warm soapy water. Rinse and drain. Do not soak the blade assembly.**
  • To Sanitize: After all solid residue is removed, fill container 3/4 full with a sanitizing solution mix.*** Return container to motor base and firmly position the two-piece lid. Run machine on a high speed for 30 seconds. Turn machine off and allow mixture to stand in the container for an additional 1 1/2 minutes. Pour out contents. Return container to motor base and run machine empty for an additional 5 seconds. Do not rinse after sanitizing. Allow container to air dry
QuarterlyBlade Agitator
  • Slowly rotate your blade assembly by hand to ensure that it turns smoothly with some resistance. Replace blade assembly if the following occurs:
  1. When spinning the spline of the blade assembly the bearing are binding or difficult to rotate.
  2. When spinning the spline of the blade assembly it pinwheels or spin too freely.
  3. Washer failure and oil leakage.
Centering Pad
  • Check EVERY MONTH to make sure that your pad is laying flat on the base. Replace the centering pad if the following occurs:
  • Tearing at container posts due to banging container on counter or improper cleaning of centering pad (placing pad in dishwasher or using improper cleaning or sanitizing products).
Drive Socket
  • Check the condition of your drive socket every 3–4 months to ensure that the ‘teeth’ are sharp. Replace drive socket if the following occurs:
  1. Worn ‘teeth’ due to removing container while running.
  2. Worn grooves due to placing container on motor base without centering pad or touching container while machine is running.
  3. Cracking at setscrew due to over tightened screw or due to a foreign object in the container.
  4. Drive socket or blade assembly needs to be replaced.